How To Create A Stunning DIY Ribbon Rose Bouquet Step-by-Step Guide
Ever wondered how to create a stunning DIY ribbon rose bouquet that’s perfect for any occasion? Well, you’re in the right place, buddy. Whether you’re planning a wedding, a birthday bash, or just want to surprise someone special, this step-by-step guide is your golden ticket. Creating a ribbon rose bouquet isn’t as hard as it seems, and trust me, it’s a game-changer. So, grab your supplies, and let’s dive right in!
There’s something magical about DIY projects, especially when they turn out beautifully. A ribbon rose bouquet isn’t just a bunch of flowers; it’s a work of art that speaks volumes about your creativity and effort. Plus, it’s super budget-friendly, which makes it even more appealing. Who wouldn’t want to save a buck or two while still impressing the crowd?
Now, before we get into the nitty-gritty of creating your masterpiece, let me tell you why this project is worth your time. Ribbon roses are timeless, elegant, and customizable. You can pick any color, texture, or style that suits your vibe. And the best part? You don’t need to be a professional florist to pull this off. With a little patience and our step-by-step guide, you’ll have a breathtaking bouquet in no time.
- P Diddy Naked Basketball The Untold Story Behind The Viral Moment
- P Diddys Adopted Daughter Ava A Deep Dive Into Her Life And Recent Video
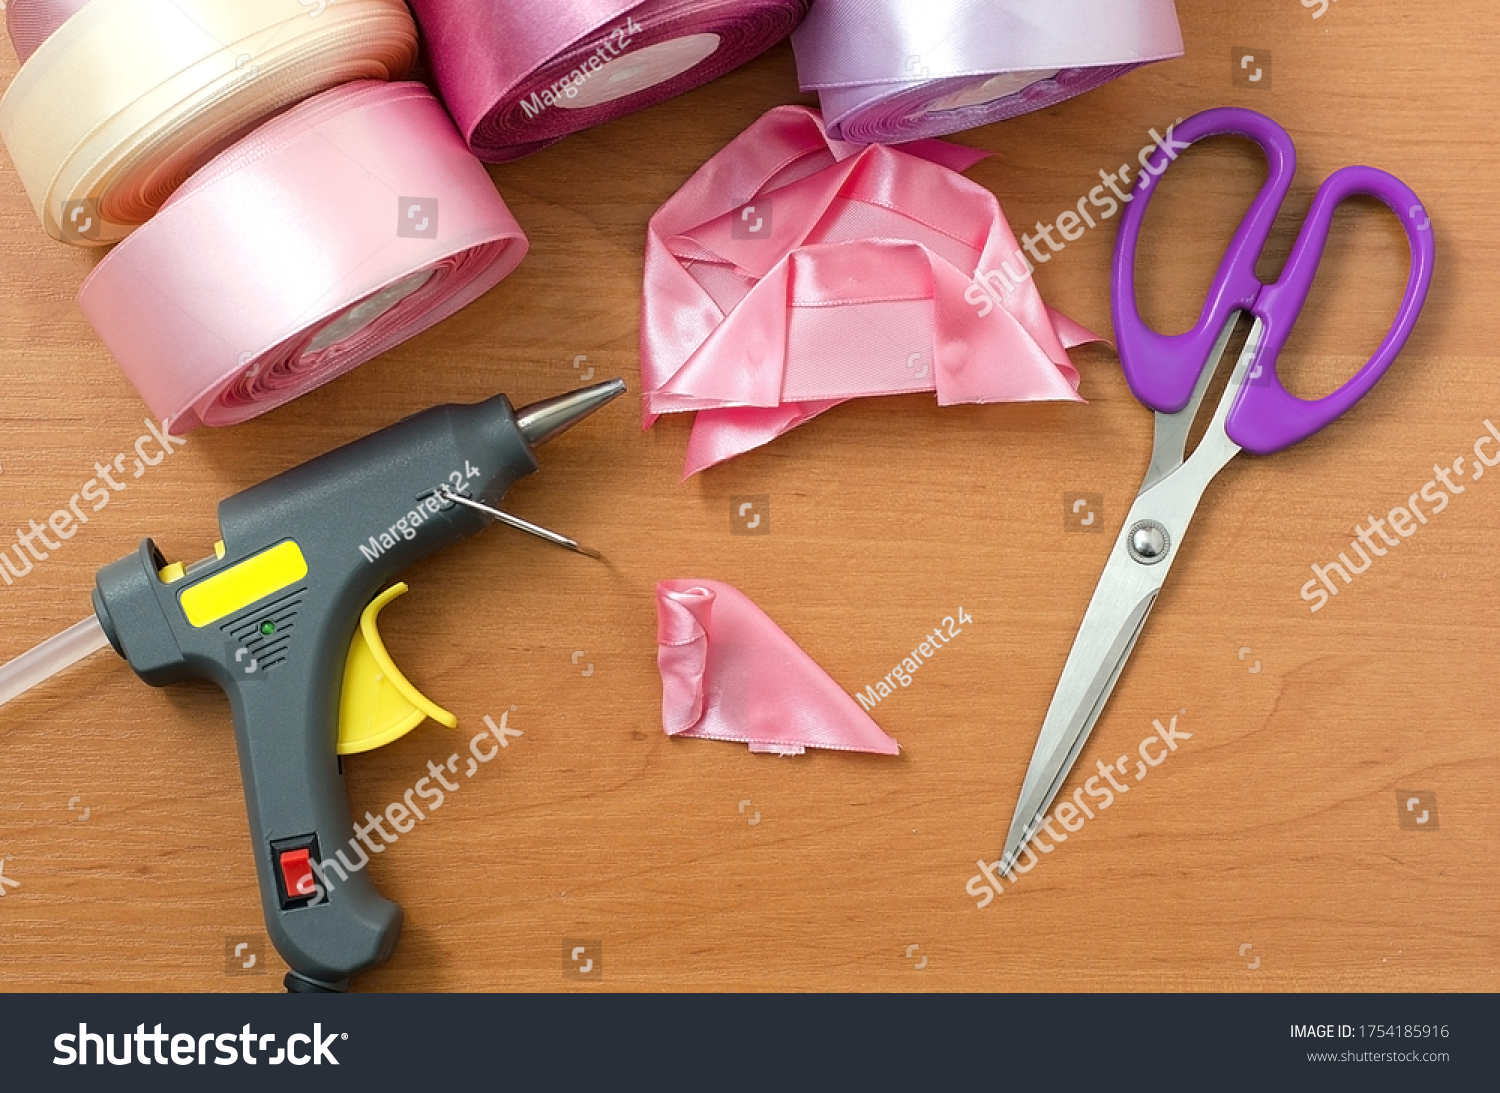
What You’ll Need to Get Started
Before we jump into the process of creating your DIY ribbon rose bouquet, it’s essential to gather all the necessary supplies. Having everything ready will make your crafting session smoother and more enjoyable. Here’s a quick rundown of what you’ll need:
- Fabric or ribbon (Choose a high-quality one for a polished look)
- Wire stems (Floral wire works wonders)
- Green floral tape
- Scissors (Preferably fabric scissors for clean cuts)
- A hot glue gun (Optional, but highly recommended)
- A bouquet holder or floral foam (To arrange your roses)
- Decorative leaves (Optional, but they add a touch of realism)
Make sure to choose ribbons that complement your theme. If you’re going for a vintage look, consider using satin ribbons. For a rustic vibe, burlap or lace ribbons might be the way to go. The possibilities are endless!
Step 1: Preparing Your Ribbon
Alright, let’s start with the basics. Preparing your ribbon is the foundation of creating beautiful ribbon roses. Here’s how you can do it:
- P Diddys House Inside The Lavish Lifestyle Of Sean Combs
- Who Is P Diddy Dating Now A Comprehensive Look Into His Love Life
Choosing the Right Ribbon
Picking the right ribbon is crucial because it sets the tone for your entire bouquet. Satin ribbons are great for a sleek, shiny finish, while organza ribbons add a touch of elegance. If you’re feeling adventurous, you can mix and match textures to create a unique look. Remember, the quality of your ribbon matters, so don’t skimp on this step.
Cutting the Ribbon
Now that you’ve chosen your ribbon, it’s time to cut it into manageable pieces. For a standard-sized rose, a 10-inch strip should do the trick. If you want larger roses, go for longer strips. Use fabric scissors to ensure clean, straight cuts. Trust me, uneven edges can ruin the aesthetics of your bouquet.
Pro Tip: If you’re making multiple roses, cut all your ribbons at once to save time later on.
Step 2: Creating the Ribbon Rose
Here comes the fun part—making the actual ribbon rose. This step requires a bit of finesse, but don’t worry; we’ll walk you through it.
Folding the Ribbon
Take one of your ribbon strips and fold it in half lengthwise. This will give your rose a more defined shape. Next, fold it accordion-style, making small, even folds. The size of each fold depends on how large you want your petals to be. A good rule of thumb is to keep each fold around 1 inch wide.
Securing the Ribbon
Once you’ve folded the ribbon, it’s time to secure it. Use a piece of floral wire to tie the ribbon tightly at the center. This will hold all the folds together and form the base of your rose. Twist the wire neatly to avoid any sharp edges sticking out.
Shaping the Rose
Now, it’s time to shape your rose. Gently pull each fold apart to create petals. Be careful not to tear the ribbon. If you’re using a hot glue gun, apply a small amount of glue to the base of each petal to keep them in place. This step might take a bit of practice, but the results are worth it.
Step 3: Adding the Stem
Once your rose is ready, it’s time to give it a stem. This step is crucial for arranging your bouquet later on.
Attaching the Wire
Take a piece of floral wire and attach it to the base of your rose. Use green floral tape to wrap the wire securely. This will ensure that the stem looks natural and blends in with the rest of the bouquet.
Wrapping the Stem
Using green floral tape, wrap the entire stem from the base of the rose down to the end of the wire. Make sure to stretch the tape slightly as you wrap to create a tight seal. This will prevent the tape from unraveling over time.
Step 4: Arranging Your Bouquet
Now that you’ve made a few ribbon roses, it’s time to arrange them into a stunning bouquet. Here’s how you can do it:
Choosing a Base
A bouquet holder or floral foam makes an excellent base for arranging your roses. It keeps everything in place and ensures that your bouquet looks neat and tidy.
Placing the Roses
Start by placing your largest roses in the center of the bouquet. Then, add smaller roses around them to create a balanced look. If you’re using decorative leaves, place them strategically to fill in any gaps and add a pop of green.
Tying the Bouquet
Once you’re happy with the arrangement, use ribbon or twine to tie the stems together. Make sure it’s tight enough to hold everything in place but not so tight that it damages the stems.
Step 5: Finishing Touches
Every great DIY project deserves some finishing touches. Here’s how you can take your bouquet to the next level:
Adding Ribbon
Wrap a beautiful ribbon around the base of your bouquet to add a touch of elegance. You can tie it into a bow or leave it as a simple wrap, depending on your preference.
Decorating the Bouquet
If you want to get fancy, consider adding some decorative elements like beads, pearls, or even glitter. These small details can make a big difference in the overall appearance of your bouquet.
Benefits of Creating a DIY Ribbon Rose Bouquet
Now that you’ve created your stunning bouquet, let’s talk about the benefits of going the DIY route:
- Cost-Effective: You save a ton of money compared to buying a pre-made bouquet.
- Customizable: You can choose any color, texture, or style that suits your needs.
- Personal Touch: A handmade bouquet carries a special meaning and shows that you put effort into it.
- Long-Lasting: Unlike fresh flowers, ribbon roses don’t wilt, making them a great keepsake.
These benefits make DIY ribbon rose bouquets a fantastic option for anyone looking to add a personal touch to their special occasions.
Tips and Tricks for Success
Here are a few tips and tricks to help you create a stunning bouquet:
- Practice makes perfect. Don’t be discouraged if your first few roses don’t turn out perfectly.
- Invest in quality materials. Cheap ribbons and wires can ruin the look of your bouquet.
- Experiment with different colors and textures to find what works best for you.
- Don’t rush the process. Take your time to ensure each rose is crafted with care.
Remember, crafting is all about having fun and expressing your creativity. So, enjoy the process and let your imagination run wild!
Conclusion
In conclusion, creating a stunning DIY ribbon rose bouquet is a rewarding and enjoyable experience. By following our step-by-step guide, you can craft a masterpiece that’s perfect for any occasion. From weddings to birthdays, ribbon rose bouquets are versatile, customizable, and long-lasting.
So, what are you waiting for? Grab your supplies and start crafting today. And don’t forget to share your creations with us in the comments below. We’d love to see what you come up with!
Table of Contents
- What You’ll Need to Get Started
- Step 1: Preparing Your Ribbon
- Step 2: Creating the Ribbon Rose
- Step 3: Adding the Stem
- Step 4: Arranging Your Bouquet
- Step 5: Finishing Touches
- Benefits of Creating a DIY Ribbon Rose Bouquet
- Tips and Tricks for Success
Happy crafting, and may your bouquet be as stunning as your creativity!

How To Create A Stunning DIY Ribbon Rose Bouquet StepbyStep Guide

Ribbon Rose Bouquets
Stepbystep Instruction Rose Made Satin Ribbon Stock Photo (Edit Now
